
How-To Guide
Customize Form Button Settings
FORM BUTTON SETTINGS
Let’s configure the automations that happen whenever a form is submitted! You’re gonna love the plethora of ways to leverage new form information.
You can find this setting in two different places on your form:
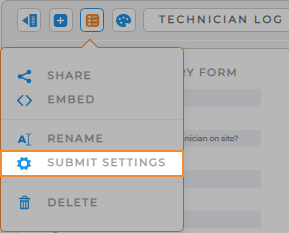
- In the top menu of your form, click the Options icon and select Submit Settings
- Click the submit button section of your form, then click the blue Settings icon that appears.
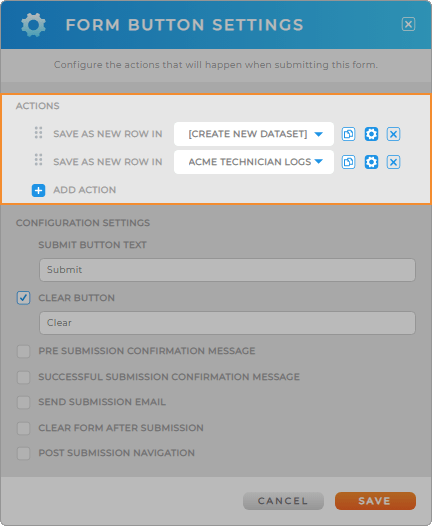
ACTIONS
Designate the dataset that new information from this form should be added to.
Do you want to add new data to a new dataset? Include it in an existing dataset? Just click the drop-down menu and select from the list.
If you need to add your form data to multiple datasets, that option is available, too. Just click the blue Add Action + button on the left side of this section to add another dataset.
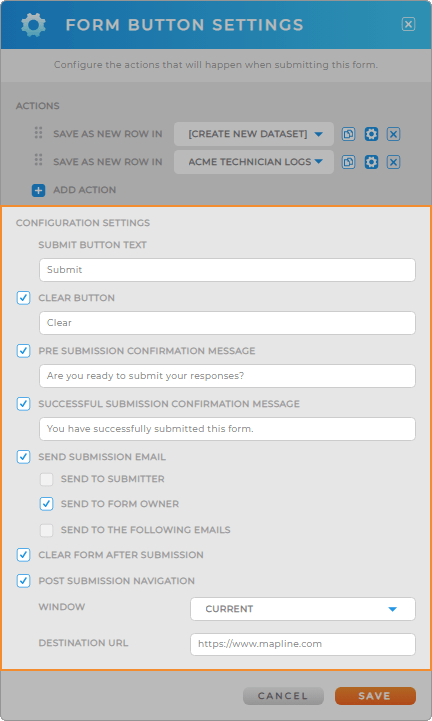
CONFIGURATION SETTINGS
Customize the form’s completion actions and user messages here.
- Submit Button Text: Customize what your ‘Submit’ button says here. Maybe you want it to say, ‘Send Update,’ or ‘Great Job!’ Play around with what works best for your team.
- Clear Button: Customize what the ‘Clear’ button says. For example, you could change it to read, ‘Reset Form’ or ‘Start Over.’
- Pre Submission Confirmation Message: This message appears before a user submits their form. Customize the message text to ensure you’re capturing the exact information you need. For example, you might want to ask employees to double-check that they completed vital parts of their job before leaving the job site.
- Successful Submission Confirmation Message: This message appears after a user submits their form, confirming that the form was submitted successfully. Customize the message text to say something pertinent to the form, such as, ‘Thank you for reaching out! We’ll be in touch within 24 business hours.’
- Send Submission Email: Send an email to your team members any time this form is submitted. Team members receive an email notification that there are form responses. This setting enables you to send an email to the form submitter, form owner, specific email addresses, or all of the above.
- Clear Form After Submission: When enabled, this setting clears the form after it’s been submitted.
- Close Window After Submission: When enabled, this setting closes the form window after submission.
- Post Submission Navigation: When enabled, this setting allows you to redirect users to a new URL as soon as the form has been submitted. Select whether you want the new URL to open in the current window, a new window, or a new tab. This is particularly useful for customers or prospects who filled out an embedded form on your website.
Enable or disable these settings by toggling the checkboxes on or off. When you’re finished, click the orange Done button at the bottom-right corner of the Form Button Settings window.
INDIVIDUAL ACTION SETTINGS
Not only can you add form data to any dataset in Mapline, but you can also configure the way that data is saved.
Maybe you only want to save certain question fields to a particular dataset? Or maybe you want to capture the latitude and longitude of the user’s device at the time of submission?
These are incredibly powerful features, and they’re all right here at your fingertips!
Click the blue Settings icon to apply more custom action settings. The New Row Settings lightbox will open, giving you access to customize your form actions– but don’t worry, the Form Button Settings lightbox will still be open when we’re done. Let’s dive in!

Pro Tip: If you’re capturing latitude and longitude and want the most accurate location data possible, check out our article on optimizing your device’s GPS location accuracy.
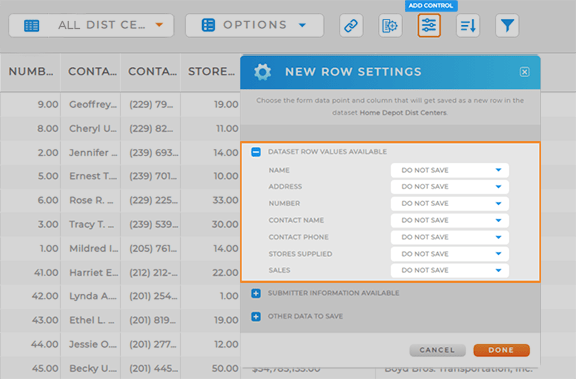
NEW ROW SETTINGS
Assign actions to specific questions in your form, ensuring the data is submitted to the most useful place(s).
FORM RESPONSES AVAILABLE
The options you will find in the dropdown boxes include:
- New Column: Create a new column in the assigned dataset containing the data from this form question.
- Do Not Save: Do not pull the data from this form question into the assigned dataset.
- Existing Dataset Columns: Add the data from this form question to an existing form column. If you have configured your action settings to add form data to an existing dataset, you’ll see a list of the available columns to which you can add new data.

Pro Tip: File fields cannot be added to an existing column. They can only be added to a new column in the assigned dataset, or you can choose not to save files to a dataset at all.
DATASET ROW VALUES AVAILABLE
This section is only visible when you’re customizing the row settings for a form action column in a dataset. This setting allows you to pull values from your current dataset and add them to whichever dataset your form data is being added to.
This is a great way to ensure that all of your cells get filled in, especially if your form isn’t collecting the same information that’s listed in the dataset you’re adding to.
This is a fantastic way to ensure your team gets the right information each and every time.
Pro Tip: Every time a form is submitted, you’re creating a new row in the assigned dataset(s). If your form(s) do not collect data for every column in the dataset, you could end up with blank cells in the new rows.
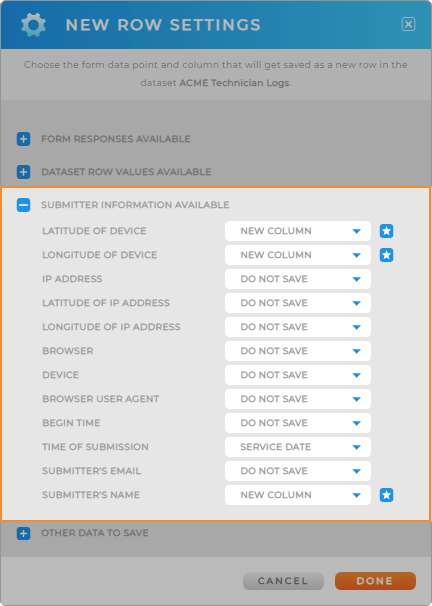
SUBMITTER INFORMATION AVAILABLE
Capture information from users every time they submit a form!
Do you need a paper trail for deliveries? Or a way to keep your team accountable for their time in the field? Capture exact coordinates, the device used to submit the form, the exact time of submission, and more.
This also gives you valuable insight into troubleshooting if a user is experiencing technical difficulties on the job.
Select from the following information to capture with each form submission:
- Latitude and longitude of device: Capture the latitude and longitude of the user’s device (geo location) at the time of submission. This is the best data to capture if you want to confirm the user’s location at the time of submission.
- IP address: Capture the user’s IP address (geo IP) at the time of submission.
- Latitude and longitude of IP address: Capture the latitude and longitude of the user’s IP address at the time of submission. This setting is ideal if you have users submitting forms primarily through desktop instead of mobile.
Pro Tip: Geo location is the most accurate metric for tracking a precise location at the time of form submission, because it pinpoints the physical location of the device itself. Geo IP can fluctuate; for example, if a user connects to public WiFi or uses a VPN, the Geo IP location will not necessarily be the same as the device’s actual location.
It’s important to note that mobile devices are typically accurate within a 16 ft radius without nearby obstacles like buildings and trees. Click here to learn more about the accuracy of GPS data for different devices.
In the United States, the Federal Trade Commission protects the privacy of consumers’ geolocation data, and COPPA protects the privacy rights of children under the age of 13. Similarly, the GDPR protects user privacy in the EU, including device geo location.
No matter where you do business, it’s best to stay up to date on the laws and regulations affecting the collection of geo data before you begin collecting it. Mapline does not provide legal counsel, nor is this information meant to replace legal advice or researching privacy best practices.
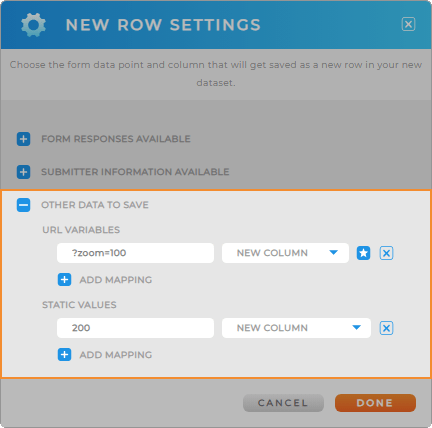
OTHER DATA TO SAVE
Create a new dataset column based on static values or URL variables.
This is particularly useful whenever you want to redirect users to a specific page after the form has been submitted, or if you have relevant values that always stay the same.
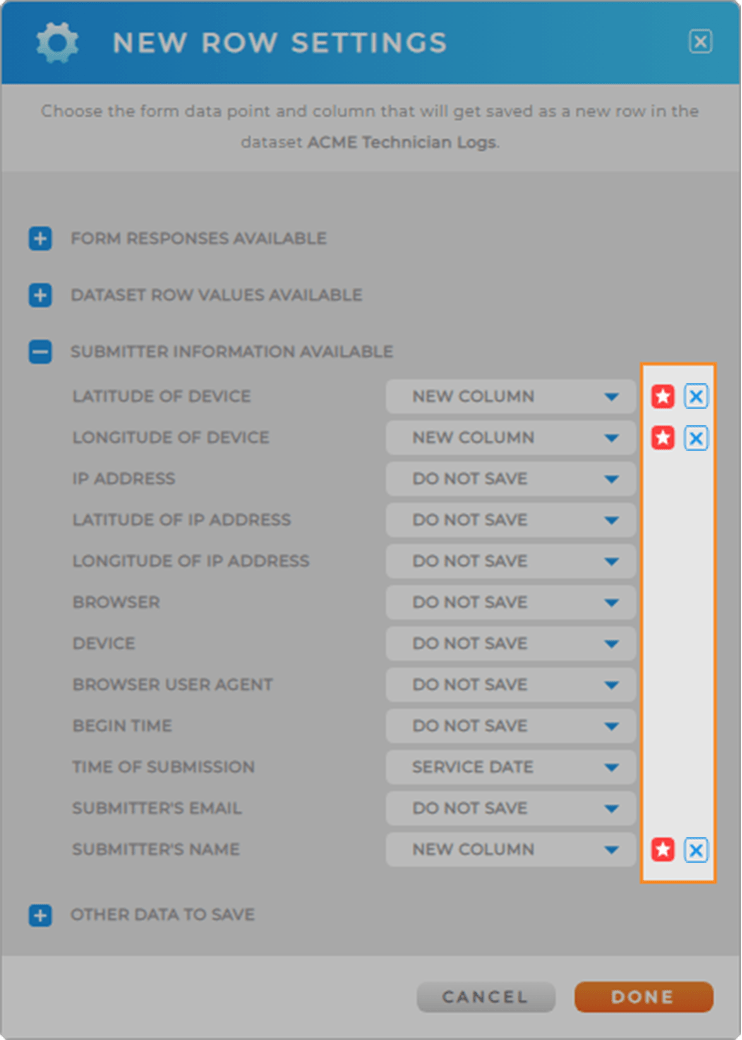
OTHER ROW CUSTOMIZATIONS
In some places, you’ll see a blue star icon next to the drop-down menu in your row settings.
Click the star to make that setting required for every form. Once clicked, the star icon turns red.
Did you add a setting by mistake? Click the blue X next to the setting to delete it. If you do not have an X, just click the drop-down menu and revert back to Do Not Save.
When you’ve finished customizing your form submission settings, click the orange Done button at the bottom-right of the New Row Settings window to apply your changes.
EDIT FORM SUBMIT SETTINGS
Form submission settings can always be edited, even after they’ve been saved. Just click the Options icon in your form menu bar, and select Submit Settings.
Easy peasy! Be sure to click the orange Save button again before closing the Form Settings window.
Pro Tip: If you’re working with Action Columns, you can always edit the Form Submit Settings by right-clicking the form column in your dataset. Select Form Submit Settings from the pop-out menu, and your form will open. Follow the same steps above to edit your form submit settings.
Note that forms created through dataset action columns do not save to the Forms Library. These forms are only accessible through the dataset itself.