Close
WE'RE ALL ABOUT
YOUR
SUCCESS
HOW WOULD YOU LIKE TO GET IN TOUCH:
Email
Email
Calendar
Cal
Close
WE'RE ALL ABOUT
YOUR
SUCCESS
HOW WOULD YOU LIKE TO GET IN TOUCH TO SCHEDULE YOUR DEMO:
Email
Email
Calendar
Cal
Mapline - mapping made powerful Close
Give us a call. We'd love to talk!

+1 800.969.1454

Close
Close
Geo Mapping Starter Close

Experience the power

Get ready to see your data in a whole new way!
magnifying glass with a checkmark inside

How-To Guide

Configure Automated Emails

Streamline your business communication with Mapline Forms’ automated emails.

With Mapline, your forms don’t just collect data; they initiate a cascade of automated actions, enhancing both customer interactions and internal processes. This way, nothing ever falls through the cracks and your team becomes more efficient than ever before!

Whenever a form is submitted, Mapline automatically sends the emails you’ve configured, allowing you to effortlessly follow up with customers and team members based on the submitted information.

For example, you can automate tasks like sending appointment reminders, setting up the next appointment, or gathering feedback through satisfaction surveys. Internally, automate your staffs’ communications by sending reminders,ensuring data reaches the right people, or triggering alerts for arising issues.

That’s some powerful stuff! Let’s dive in to how to configure and utilize automated emails so you can get started right away.

Edit Form Settings

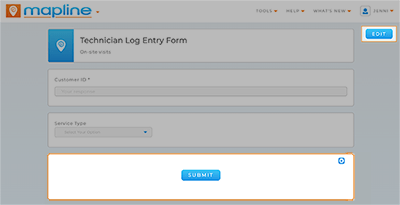
Open the form you want to use and select the blue EDIT button in the top-right corner of your screen.

(If you need to create a new form first, go ahead and do that now).

Once you have your form open, scroll down to the SUBMIT button (usualy located at the bottom of your form) and click on it. Next, click the blue SETTINGS button that appears at the top-right of the button section.

Screenshot of the coverage circle lightbox, with the Fill section highlighted.

Configure Email Settings

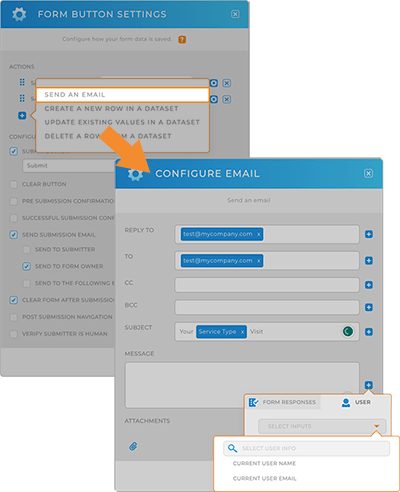
In the ACTIONS section, click the blue + and select SEND EMAIL.

From here, configure the automated email to best suit your needs:

Recipient(s): Input the email address(es) of the desired recipients who should receive the automated email notifications. Input email addresses manually or click the blue + to choose dynamic content from your form responses.

Subject Line: Craft a subject line that clearly conveys the purpose of the email.

Message Content: Compose the content of your email. This can be a thank-you message, confirmation, or any other relevant information.

Leverage Dynamic Email Fields: Make use of Mapline’s dynamic email fields to personalize your messages. Dynamic email fields automatically populate with information from the submitted form, such as contact details, first name, and more. This enhances the relevance and personalization of your automated emails.

Mapline Coverage Areas lightbox, with the radius section highlighted

Finalizing Automated Emails

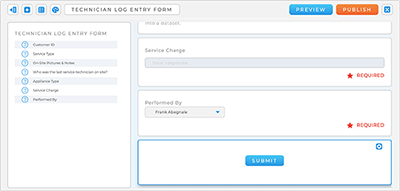
Any changes you make to your form will auto-save; however, your changes will not go live until you click the orange PUBLISH button at the top-right of your screen.

And that’s it! Now, whenever a user submits answers to your form, an automatic, custom email will be sent out to the recipients you’ve specified, containing key details from your form submission, and ensuring that nothing ever falls through the cracks.

Now that’s what we call a powerful automation!

Screenshot of a purple radius circle on a grayscale map. Four blue pins and one yellow pin lie within the circle. Two blue pins lie outside of the circle.

Check out what else you can do with form submissions

If you think that’s useful, wait until you see what else you can automate with forms! Here are some truly incredible ways to make your data work for you, all automatically:

  • Pre-designate form responses
  • Designate form responses that are only relevant to the user’s current location
  • Automatically add form responses to an existing dataset
  • Attach a static PDF to Mapline forms

If you need to do automate anything that has to do with your form submissions, we’ve got you covered!